Co-authored-by: Raunak Raj <nkray21111983@gmail.com>
Co-authored-by: Thorsten Ball <mrnugget@gmail.com>
Co-authored-by: Bennet <bennet@zed.dev>
Co-authored-by: Marshall Bowers <elliott.codes@gmail.com>
Co-authored-by: Joseph T Lyons <JosephTLyons@gmail.com>
Co-authored-by: Mikayla <mikayla@zed.dev>
Co-authored-by: Jason <jason@zed.dev>
Co-authored-by: Antonio Scandurra <me@as-cii.com>
Co-authored-by: Max Brunsfeld <maxbrunsfeld@gmail.com>
Co-authored-by: Marshall <marshall@zed.dev>
Co-authored-by: Nathan Sobo <nathan@zed.dev>
Co-authored-by: Jason Mancuso <7891333+jvmncs@users.noreply.github.com>
Co-authored-by: Piotr Osiewicz <24362066+osiewicz@users.noreply.github.com>
69 lines
2.9 KiB
Markdown
69 lines
2.9 KiB
Markdown
# Getting Started
|
|
|
|
Welcome to Zed! We are excited to have you. Here is a jumping-off point to getting started.
|
|
|
|
## Download Zed
|
|
|
|
### MacOS
|
|
|
|
You can obtain the stable builds via the [download page](https://zed.dev/download). If you want to download our preview build, you can find it on its [releases page](https://zed.dev/releases/preview) After the first manual installation, Zed will periodically check for and install updates automatically for you.
|
|
|
|
You can also install Zed stable via Homebrew:
|
|
|
|
```sh
|
|
brew install --cask zed
|
|
```
|
|
|
|
As well as Zed preview:
|
|
|
|
```sh
|
|
brew install --cask zed@preview
|
|
```
|
|
|
|
### Linux
|
|
|
|
For most people, the easiest way to install Zed is through our installation script:
|
|
|
|
```sh
|
|
curl -f https://zed.dev/install.sh | sh
|
|
```
|
|
|
|
If you'd like to help us test our new features, you can also install our preview build:
|
|
|
|
```sh
|
|
curl -f https://zed.dev/install.sh | ZED_CHANNEL=preview sh
|
|
```
|
|
|
|
This script supports `x86_64` and `AArch64`, as well as common Linux distributions: Ubuntu, Arch, Debian, RedHat, CentOS, Fedora, and more.
|
|
|
|
If this script is insufficient for your use case or you run into problems running Zed, please see our [Linux-specific documentation](./linux.md).
|
|
|
|
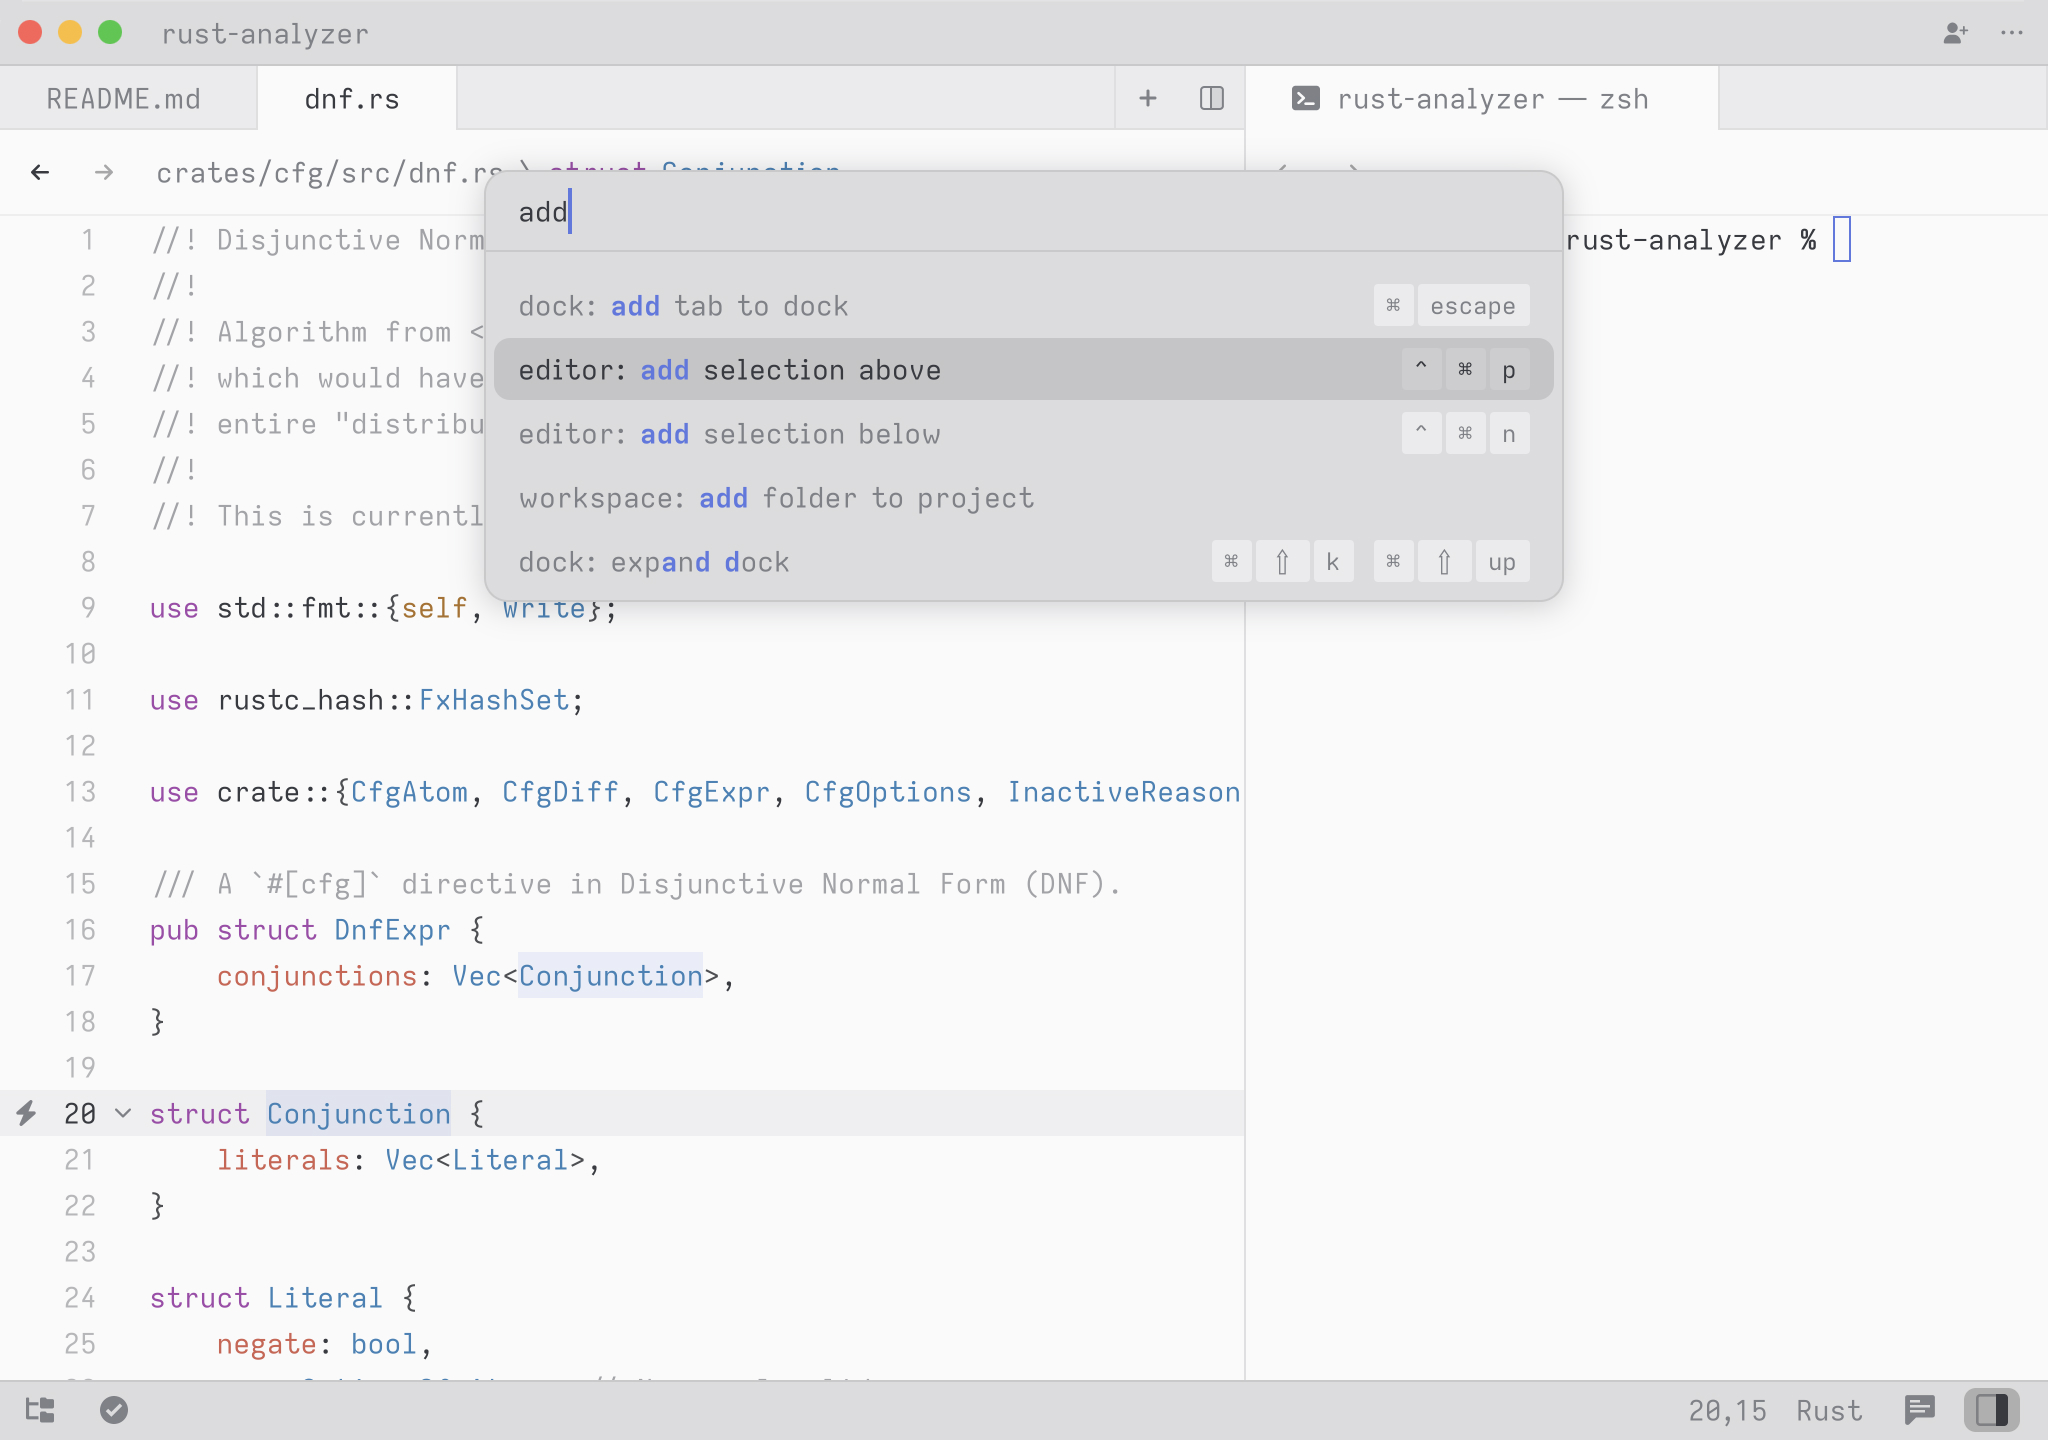
## Command Palette
|
|
|
|
The Command Palette is the main way to access functionality in Zed, and its keybinding is the first one you should make yourself familiar with.
|
|
|
|
On macOS, use `⌘-P` (`cmd-shift-p`) to open the Command Palette.
|
|
|
|
On Linux, use `⌃-P` (`ctrl-shift-p`) to open the Command Palette.
|
|
|
|
The Command Palette allows you to access pretty much any functionality that's available in Zed.
|
|
|
|
|
|
|
|
Try it! Open the Command Palette and type in `new file`. You should see the list of commands being filtered down to `workspace: new file`. Hit return and you end up with a new buffer!
|
|
|
|
Any time you see instructions that include commands of the form `zed: ...` or `editor: ...` and so on that means you need to execute them in the Command Palette.
|
|
|
|
## Configure Zed
|
|
|
|
Use `⌘` + `,`, or `ctrl` - `,` to open your custom settings to set things like fonts, formatting settings, per-language settings, and more.
|
|
|
|
On macOS, you can access the default configuration using the `Zed > Settings > Open Default Settings` menu item. See [Configuring Zed](./configuring-zed.md) for all available settings.
|
|
|
|
On Linux, you can access the default configuration via the Command Palette. Open it with `ctrl-shift-p` and type in `zed: open default settings` and then hit return.
|
|
|
|
## Set up your key bindings
|
|
|
|
On macOS, you can access the default key binding set using the `Zed > Settings > Open Default Key Bindings` menu item. Use `⌘` + `K`, `⌘` + `S` to open your custom keymap to add your key bindings. See Key Bindings for more info.
|
|
|
|
On Linux, you can access the default key bindings via the Command Palette. Open it with `ctrl-shift-p` and type in `zed: open default keymap` and then hit return.
|